

How To Make A Dovetail Template
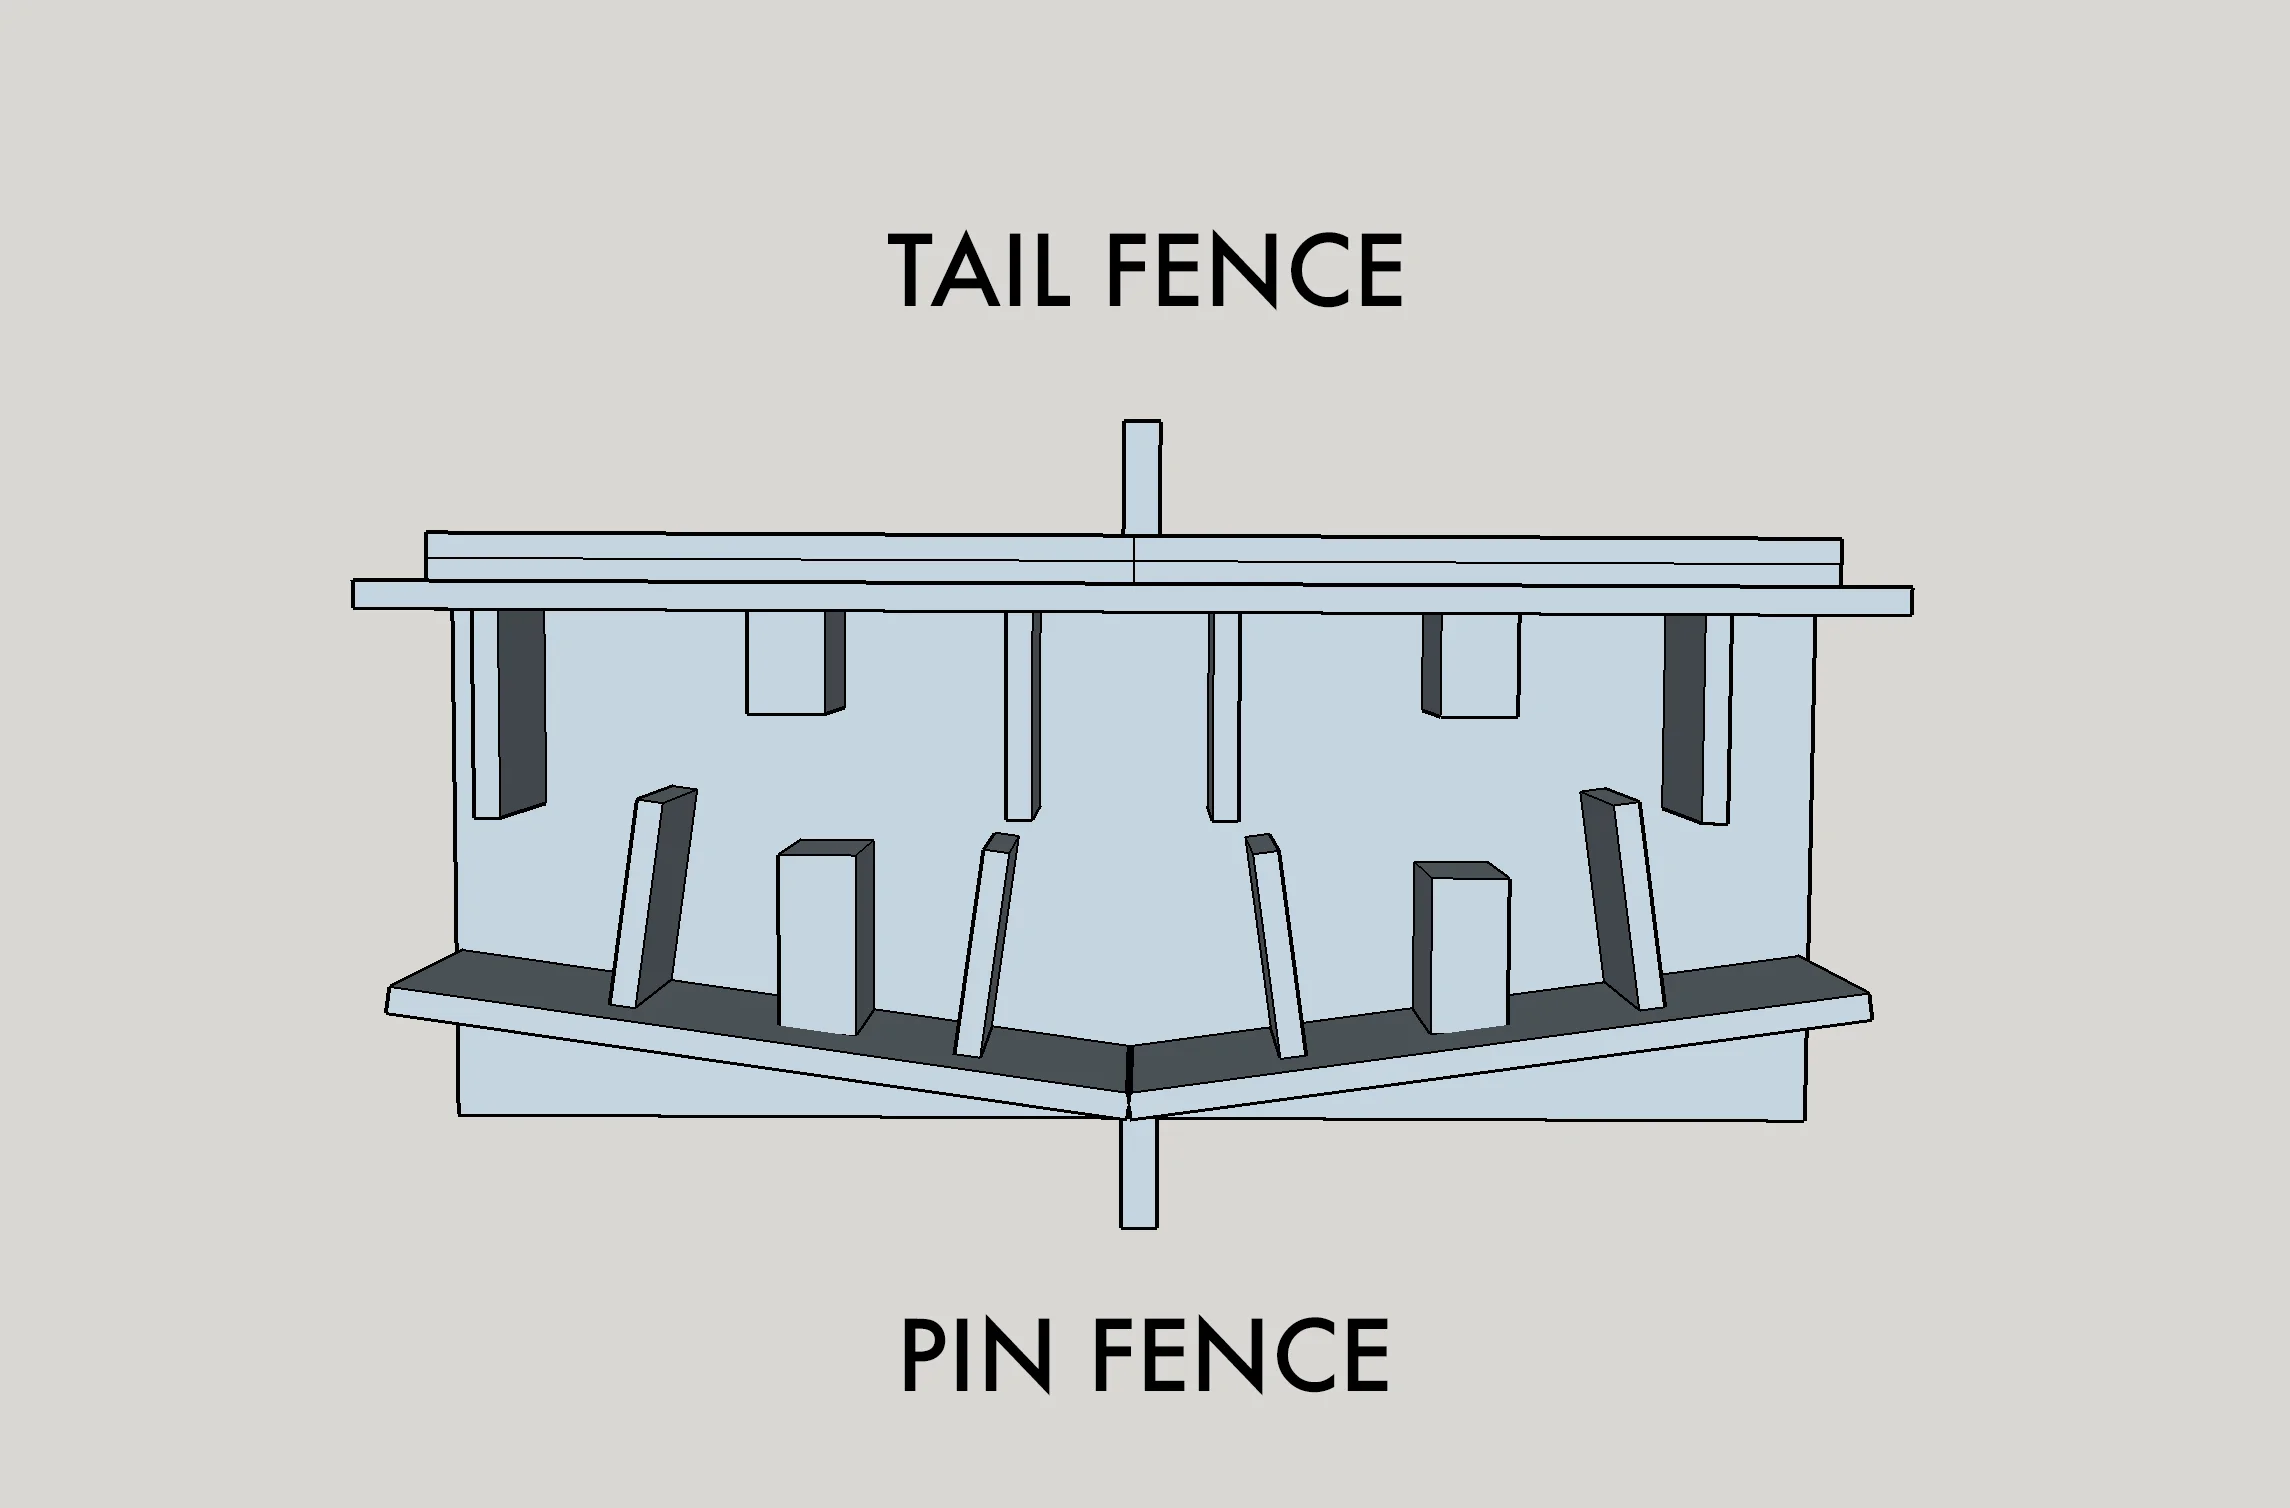
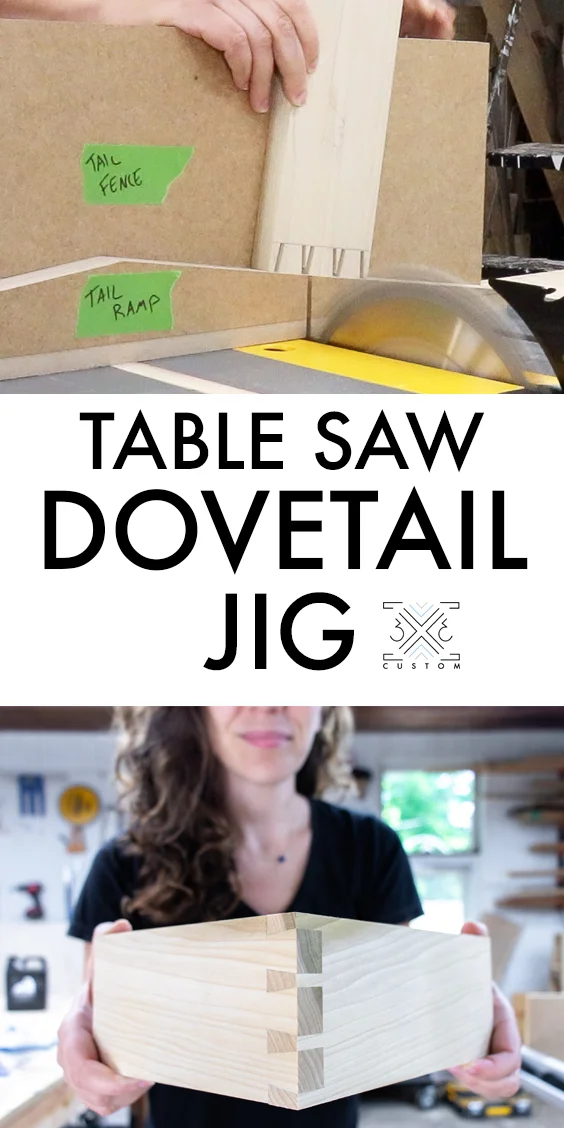
Dovetail Jig for the Table Saw
I take seen a few pictures of people using a jig for the table saw to create dovetails, merely I could not find any videos on anyone making this jig, so I decided to try and figure it out! I call back the results are pretty absurd, then cheque out the video below to meet how I made it!
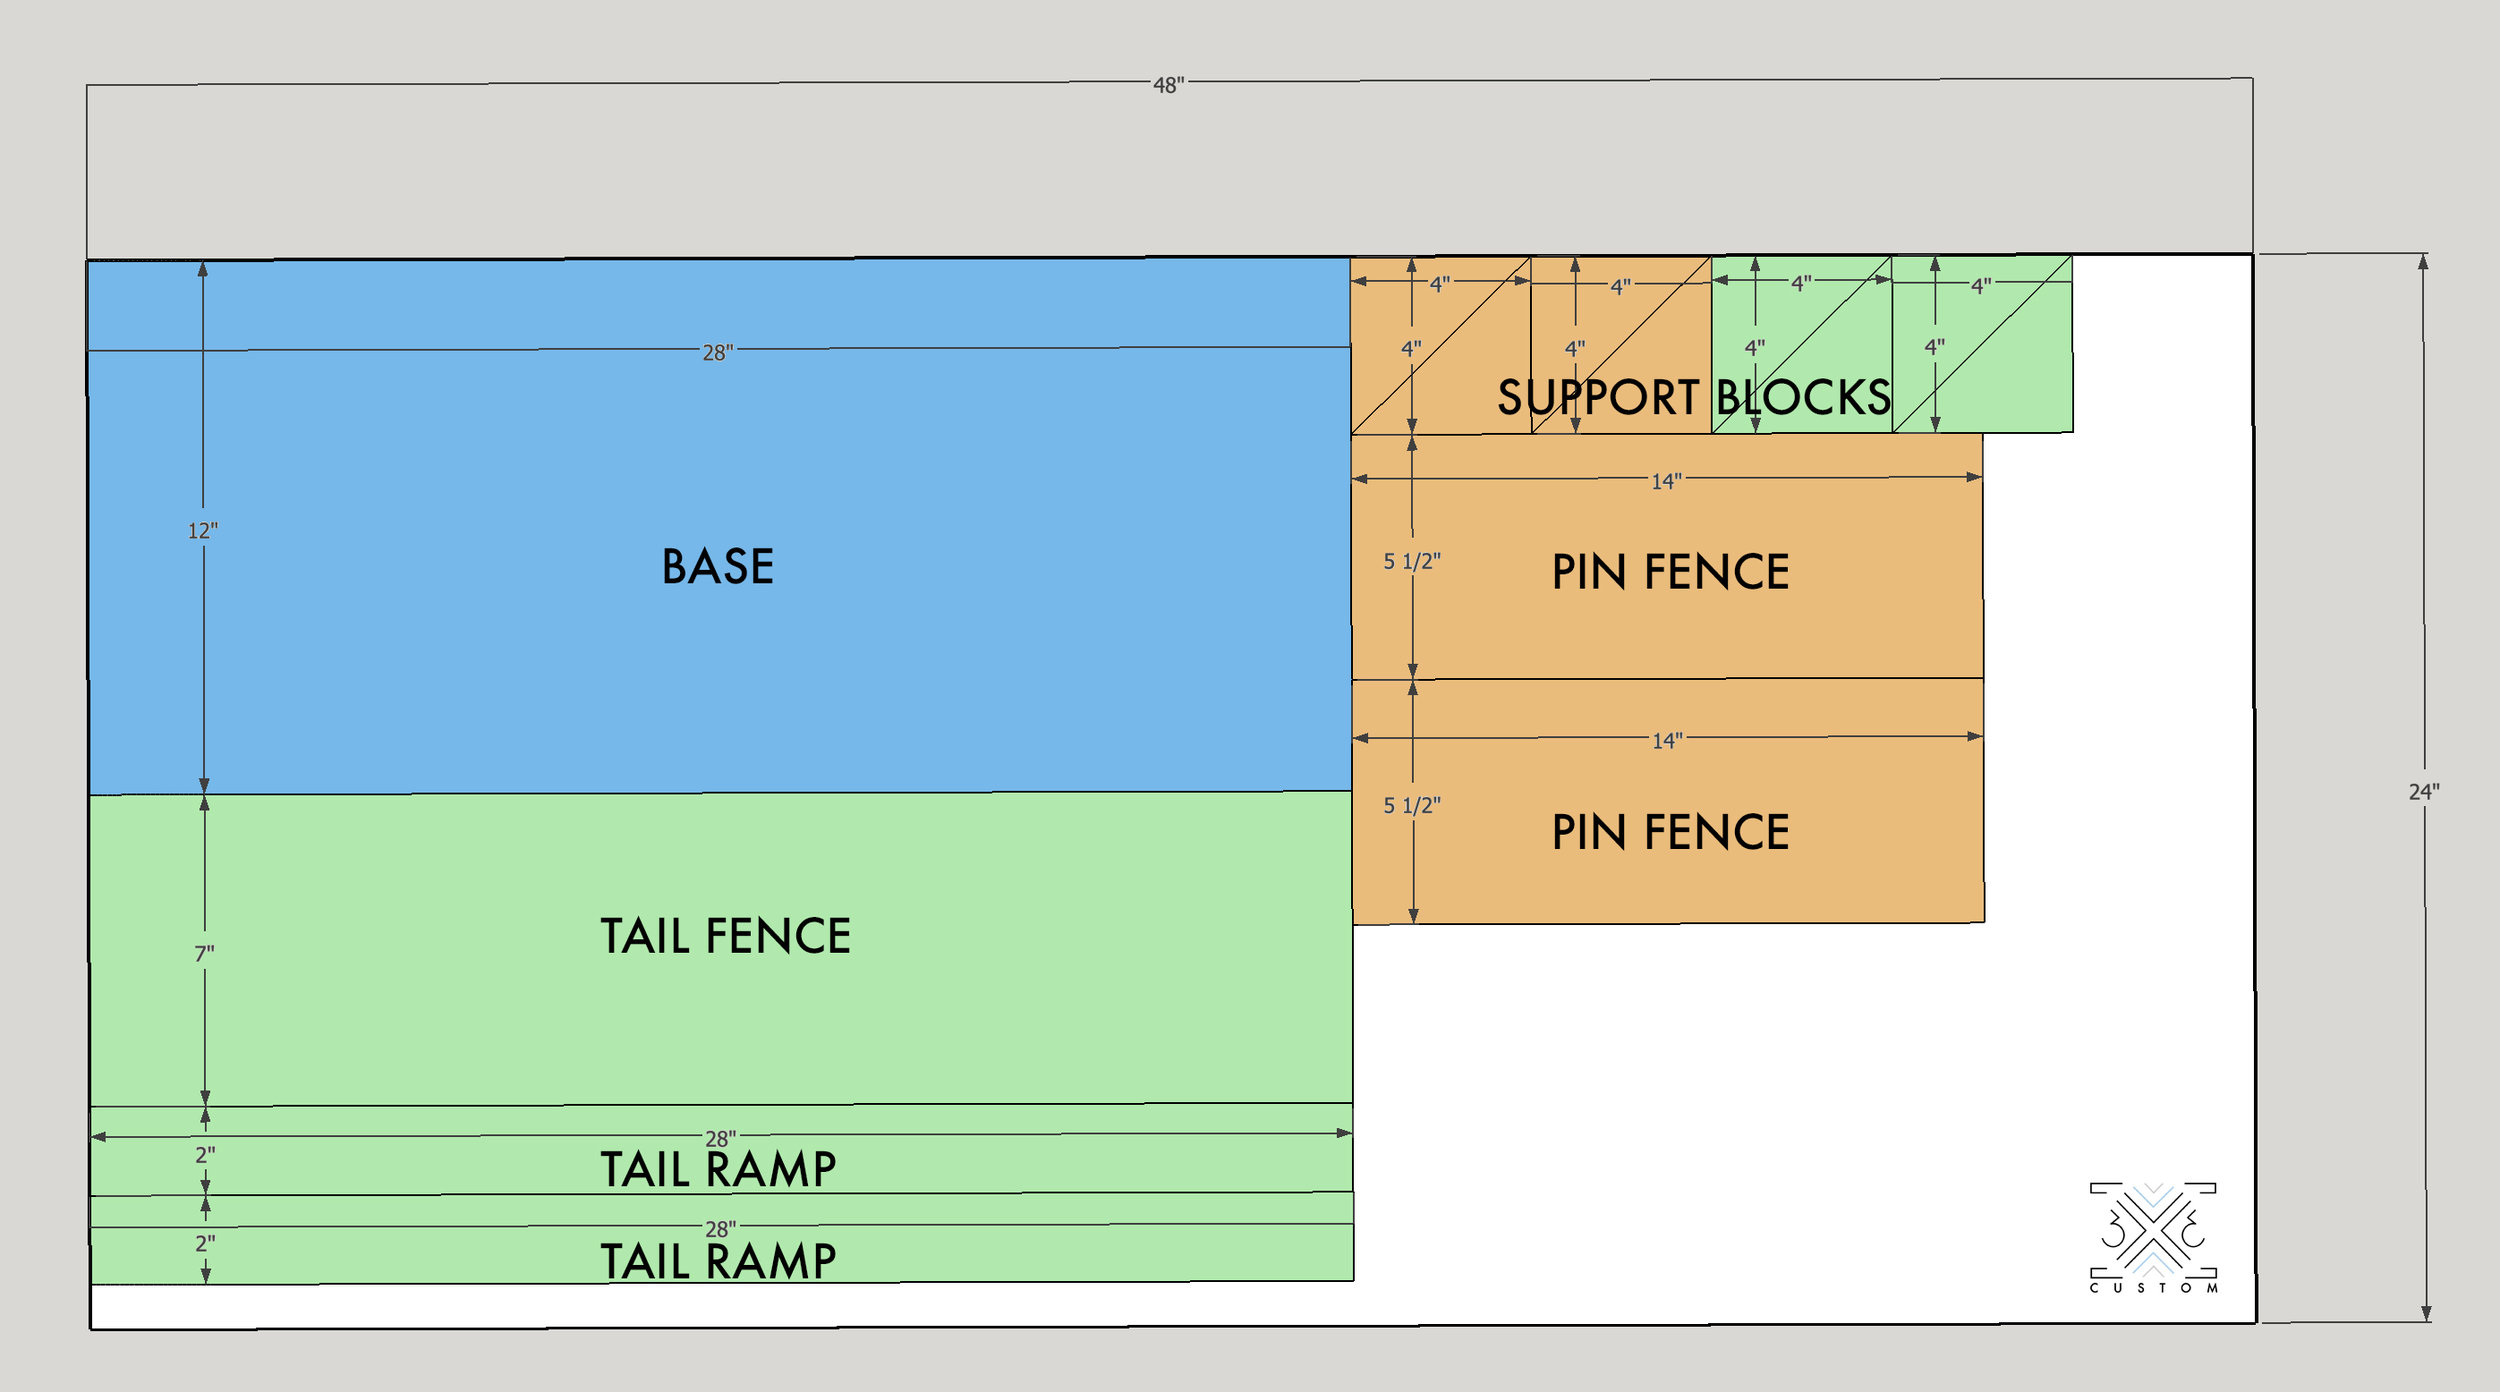
I used ane/two" MDF for about of the jig and I cutting everything to size.
I fabricated this jig into two split components because of the job site saw that I use. In that location are just well-nigh 6" of table in front of my bract. So if you have a larger saw, I would recommend making this into one jig.

The cut list below has the base cut at 12" wide, if you are making this jig into ii split parts (like I did), cut the base of operations in half at 6" broad.
Also annotation, you should cutting the 4"x4" support blocks into triangles, and so you go 8 triangles.
After cutting all the pieces to size, the start matter to determine is what angle you want your dovetails to be.
I decided to become with 8 degrees, merely this part is customizable.
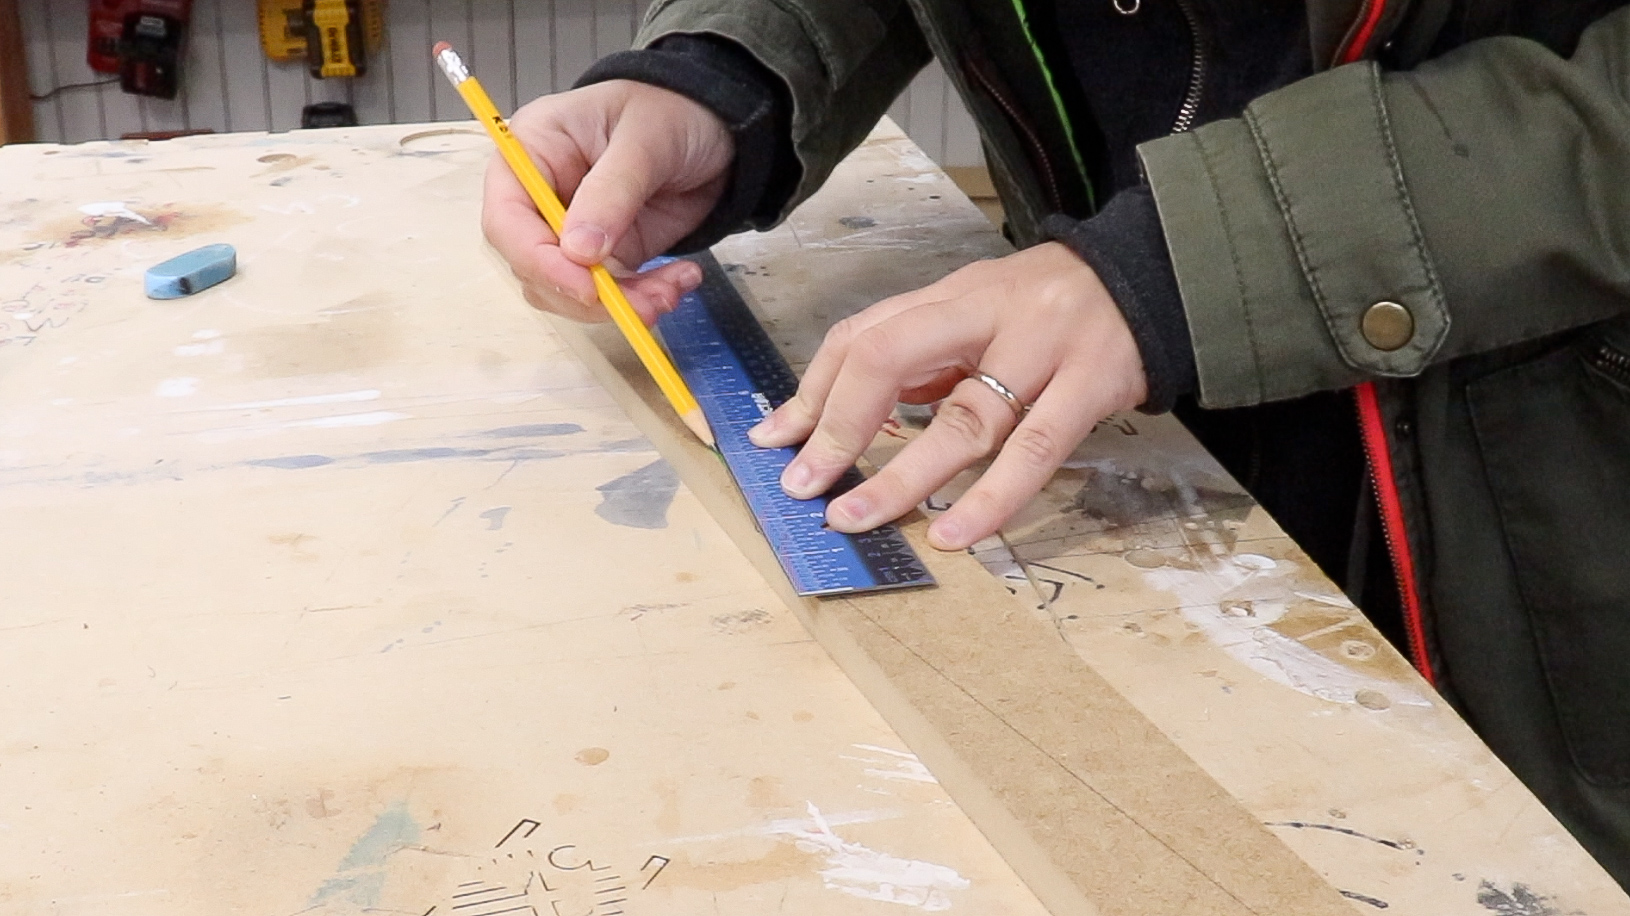
The 8 degree angle is really estimate, I used a ane:7 ratio to get to this angle.
If you have a piece of wood that is 7" long past 1" wide and you make a line from the lower correct paw corner to the upper left hand corner the angle will exist about viii degrees.

You will determine this angle on the tail board ramp.
My pieces were cut to 28" long past two" wide, so I marked a line in the center at 14". This fashion, that ratio simply gets doubled (instead of one:7, information technology is at present 2:14). I used a directly border from 1 corner to that fourteen" mark to create the angle that is approximately 8 degrees.
I did that on both sides of the piece to create an obtuse triangle.
The tail ramp consists of 2 pieces of the one/2" MDF to create a wider surface for your workpiece to rest on.
I marked out the angle on the tail ramp before gluing information technology upward because I used some brad nails to hold it into identify to prevent slippage from the clamps and I wanted to brand certain I wasn't going to cut into any brads.

Subsequently the mucilage dried, I used my Taper jig to cut the angles of the tail ramp.
This is the most complicated part of making this jig, but you don't have to stress on getting the angles perfect since you will be using this tail ramp as a guide for the pin fence.
As long every bit those two angles are the aforementioned, it doesn't matter what angle yous cut this ramp at.
Having this taper jig was really a huge help for this step.

Since the pivot fences are going to be glued onto the base at 8 degree angles to each other (to match the tail ramp), I cut about an eight degree bevel on the ends where they are going to encounter in the miter saw.

At present everything is cut and ready to be assembled!
Notation: I made my jig in two parts, and so you see two base pieces in the picture below. If you are making it into one jig, yous should have ane base.

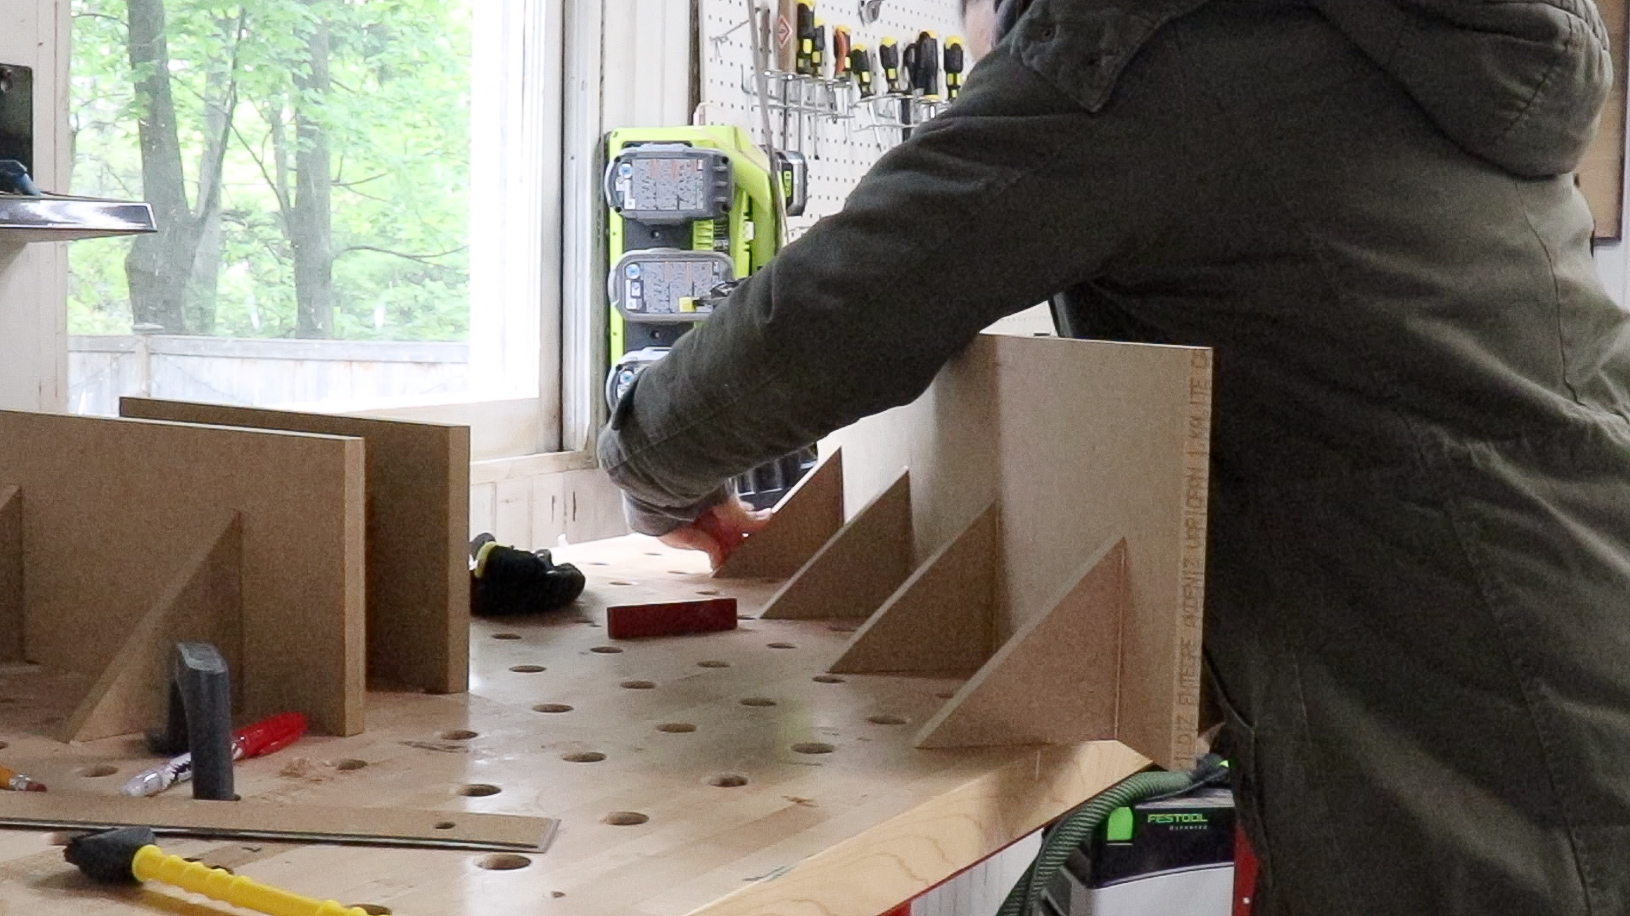
The first step in the assembly is to mucilage the support blocks to the fences.
Before gluing them on I made sure that I wasn't putting a back up block where the blade was going to go since I am reinforcing them with brad nails.
I did this for both the pin fences and the tail contend, making sure everything was really square equally I moved along.
This jig will run along the miter slots on your table saw, so I fabricated a runner that was the same thickness every bit my miter slots and attached it to the base.
(In the film below, I used HDPE for the runners, merely if you scout the YouTube video, yous'll meet there was a scrap of a problem, and I swapped them out for oak runners.
I figured information technology was going to be easier to attach the runners before I attached the fences, merely I think that might accept been a mistake. I would suggest putting the runners on later on you accept assembled the fences.

The pivot fences get assembled offset because you can use the tail ramp as a layout guide.
This is why it doesn't really thing what angle you make the tail ramp, every bit long every bit y'all are lining up the pin fences to the same angle, everything should line upwards properly.

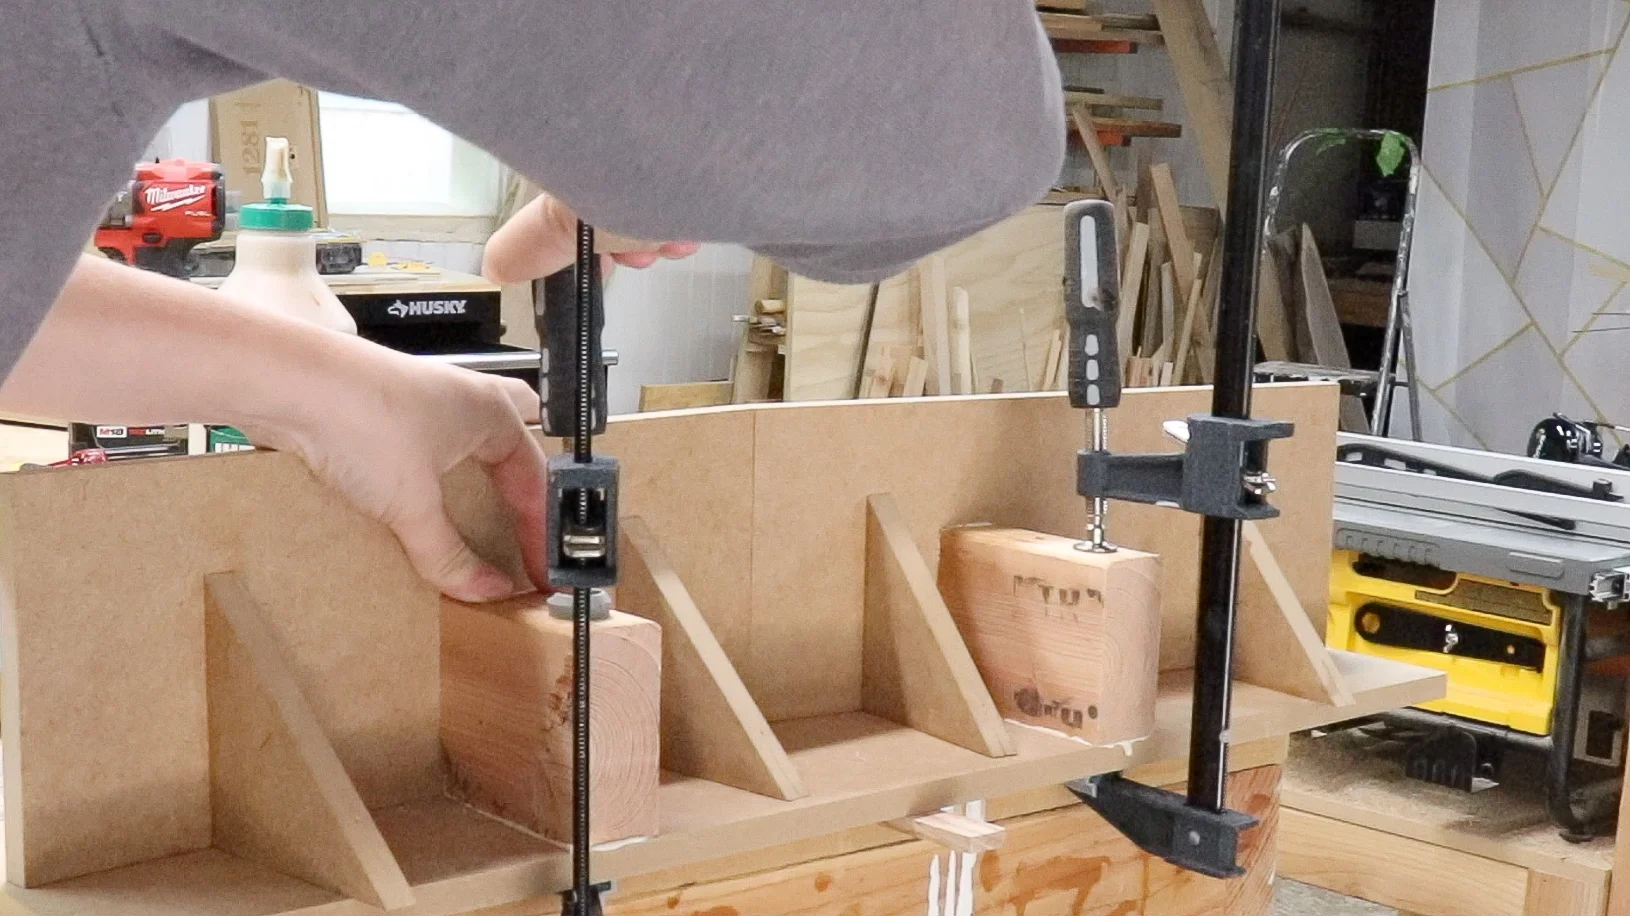
I used a combination of wood glue and CA gum to prepare the pin fences in place.
The CA glue acts as a clench considering it dries super fast, the wood mucilage will dry slowly, but it volition agree its bail for longer.
I fabricated sure everything was really square and when the glue gear up upward a fleck I also reinforced everything with brad nails from underneath.

I repeated the same process with the tail ramp and tail fence.
This assembly was a lot easier, I merely had to brand certain the tail ramp was fully flush against the front of the base.

The last step is to add together a safety feature.
I fabricated an initial cutting on both sides of the jig by running them through both miter slots. This only lets me know exactly where the saw kerf is so I tin add together a support block to house the blade.

I cutting upward some bit 2x4'due south and glued them onto the back of the jig where the blade comes out. The blade gets trapped inside those 2x4'south to continue my fingers safe.
Since the pin fences are angled at around viii degrees I cut an viii caste angle on those 2x4's to counteract that angle.
If you lot were making this jig on i big piece, this is what it should look like when viewed from the acme.
At present the jig is done!
Here's how to employ it….
With this jig information technology's easier to cutting the pins first.
After laying out your pins, you put the pin jig in the left manus miter slot and line upwards your cut with the blade on the right hand side of your layout line.
After making your initial cuts, you can commencement to clear out the waste merely don't clear all the waste!
You want to leave well-nigh half of the waste material so you can cut the rest on the other side of the jig.

This is what information technology should look like when you accept cleared half of the waste from your pins.
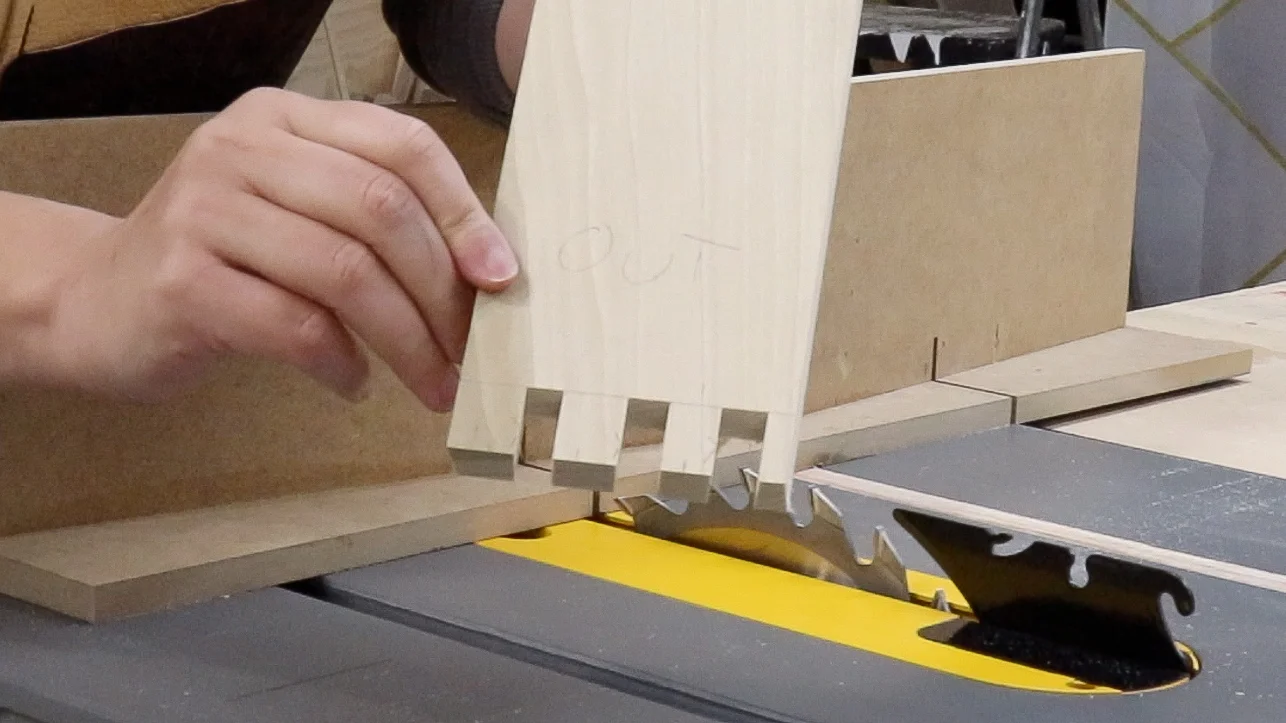
Then y'all flip the jig to the correct miter slot and y'all clear of the rest of you pins in the left side of your cutting line.

Fresh off the saw, these pins looks awesome.
Note: I am using a Flat Peak blade to make these cuts. This makes a large difference. If I were to use a combo blade that has alternate bevel teeth, the cuts would have piffling lines in them and I would need to do some make clean up work with a chisel.
I explicate more about the deviation betwixt these blades on my finger joint post —> How To Make Finger Joints

Even if the cuts of your pins were not perfect, information technology doesn't matter since you are going to use the pins themselves to mark out the cuts for the tails.
Only place the pin board on the mating piece and trace out the pins with a abrupt pencil.
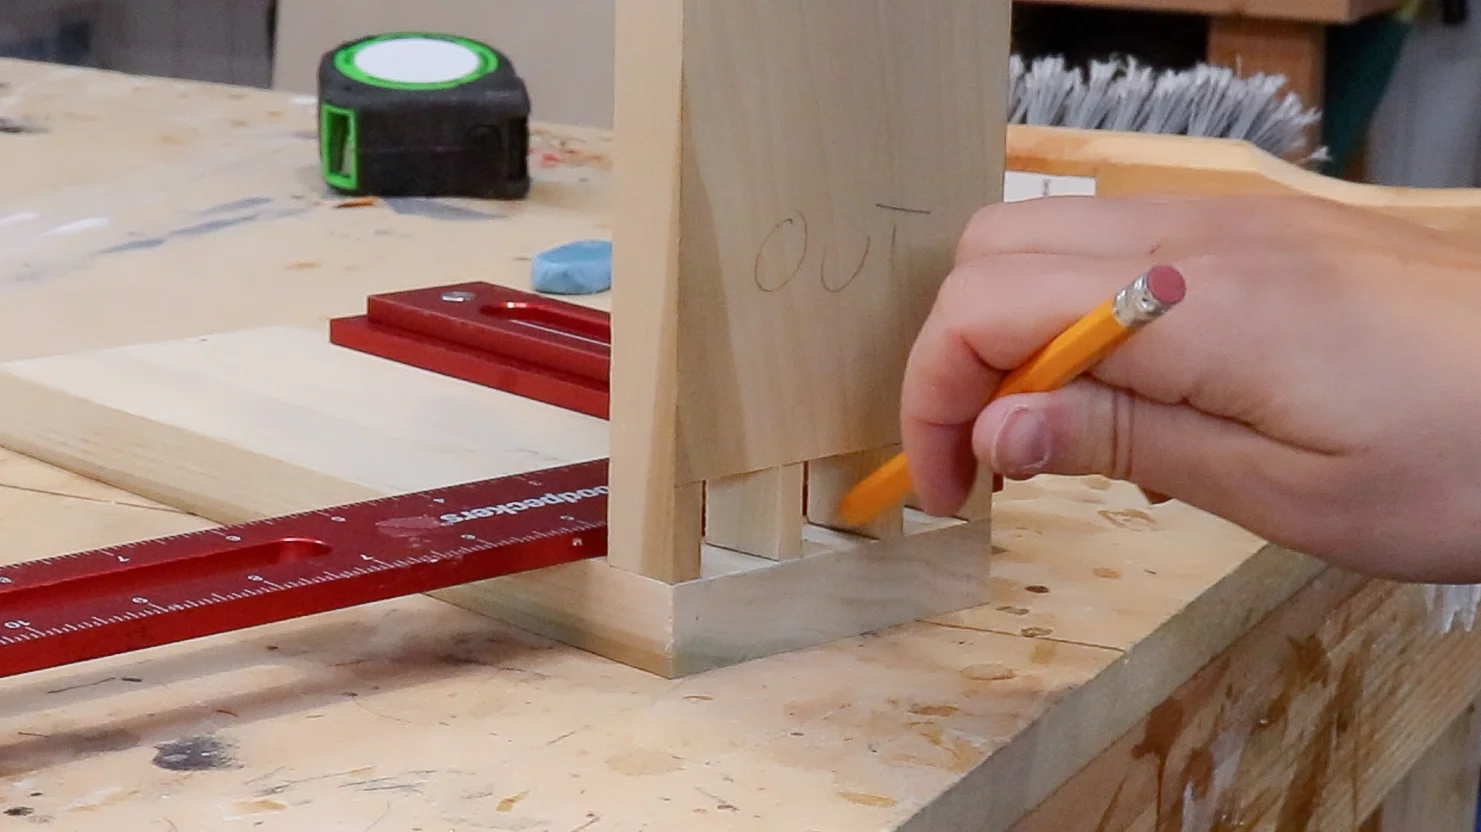
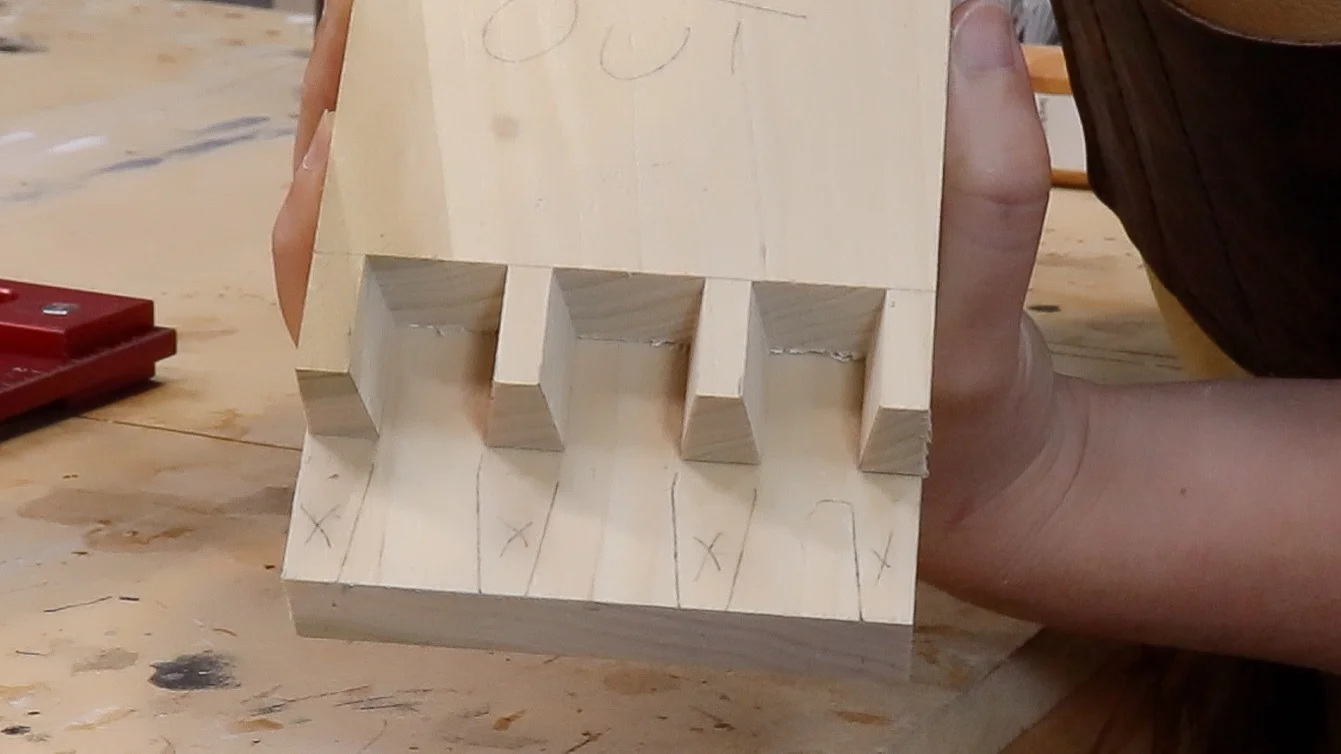
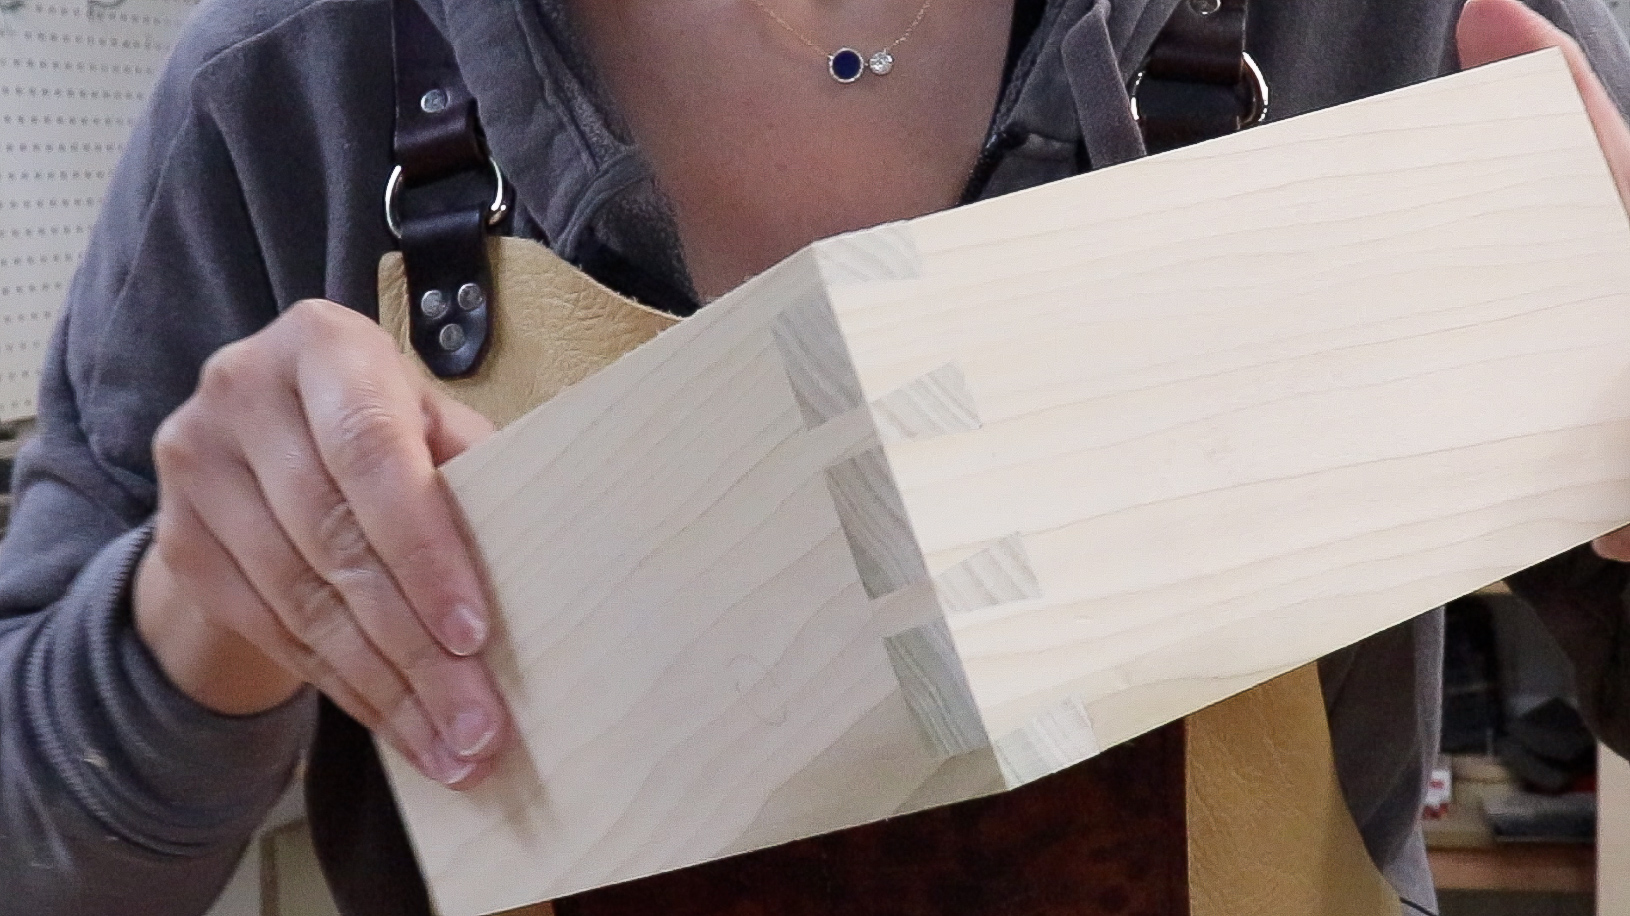
In this example I made iv pins, after marking out the waste with an "X", you can clearly come across this will result in three tails.
Cutting the tails is a bit more than difficult than the pins.
The procedure starts off the same, cut along your cut lines in 1 miter slot.
Yous desire to cutting right next to your line, non on the line.

And then switch to the other miter slot and make the rest of the cuts.
Because of the angle of the blade though, information technology is not possible to fully clean upwards the cuts on the table saw.
So the pins crave a flake more piece of work.

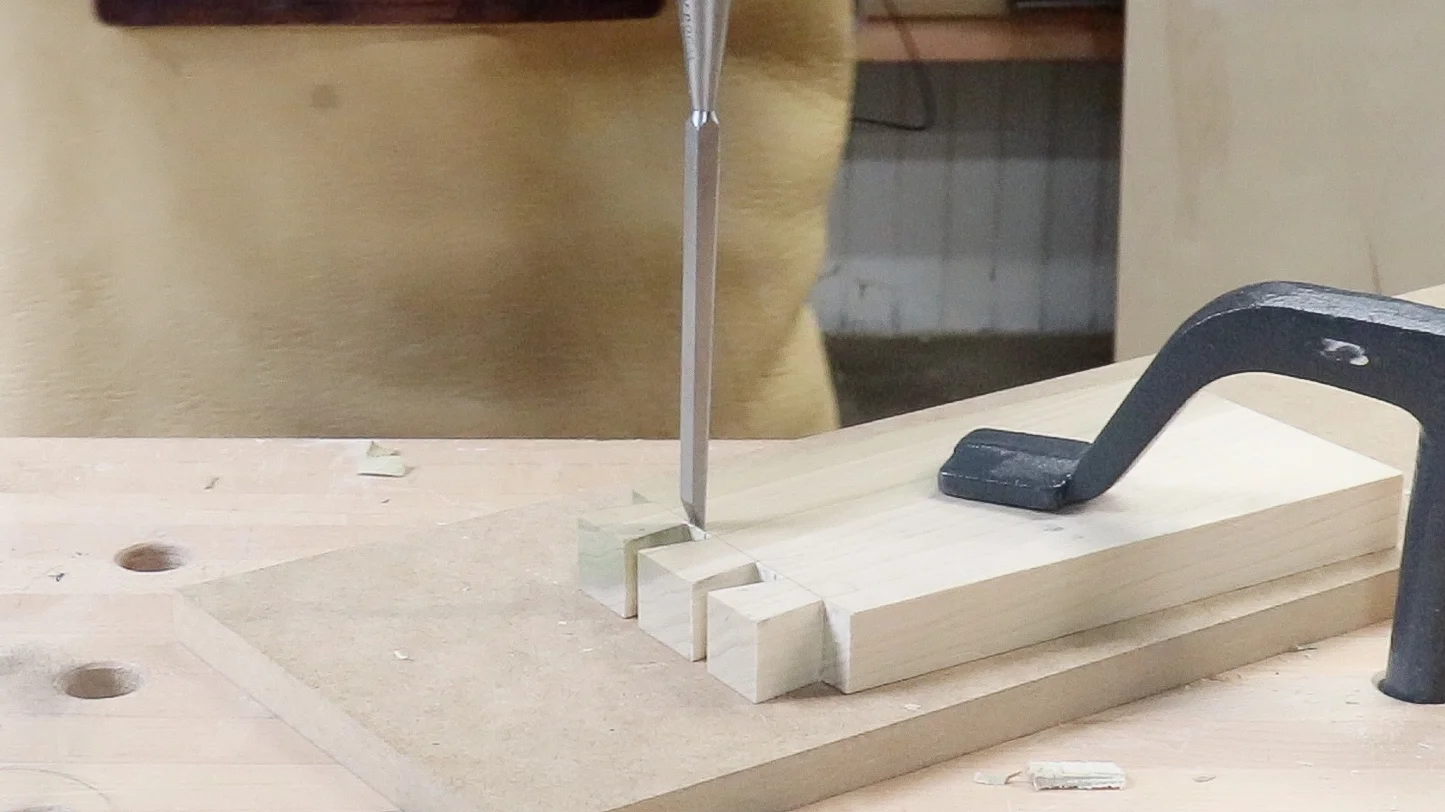
At that place are a few means you tin can clean up the pins.
One, with a handsaw for the terminate pieces and a coping saw for the middle ones.

Two, y'all can prepare a fence at the bandsaw and clear up as much of the waste material equally possible, just utilise an 1/8" blade and so it tin can fit into the slots.

Either way y'all choose, y'all are going to need to do some final touch upward work with a chisel.
I am non an expert at this AT ALL. This was actually simply the tertiary dovetail I have ever made. I am simply saying this to inspire y'all to give it a try.
Subsequently a couple minutes of chisel piece of work the joint fit and so nicely and I was so happy!
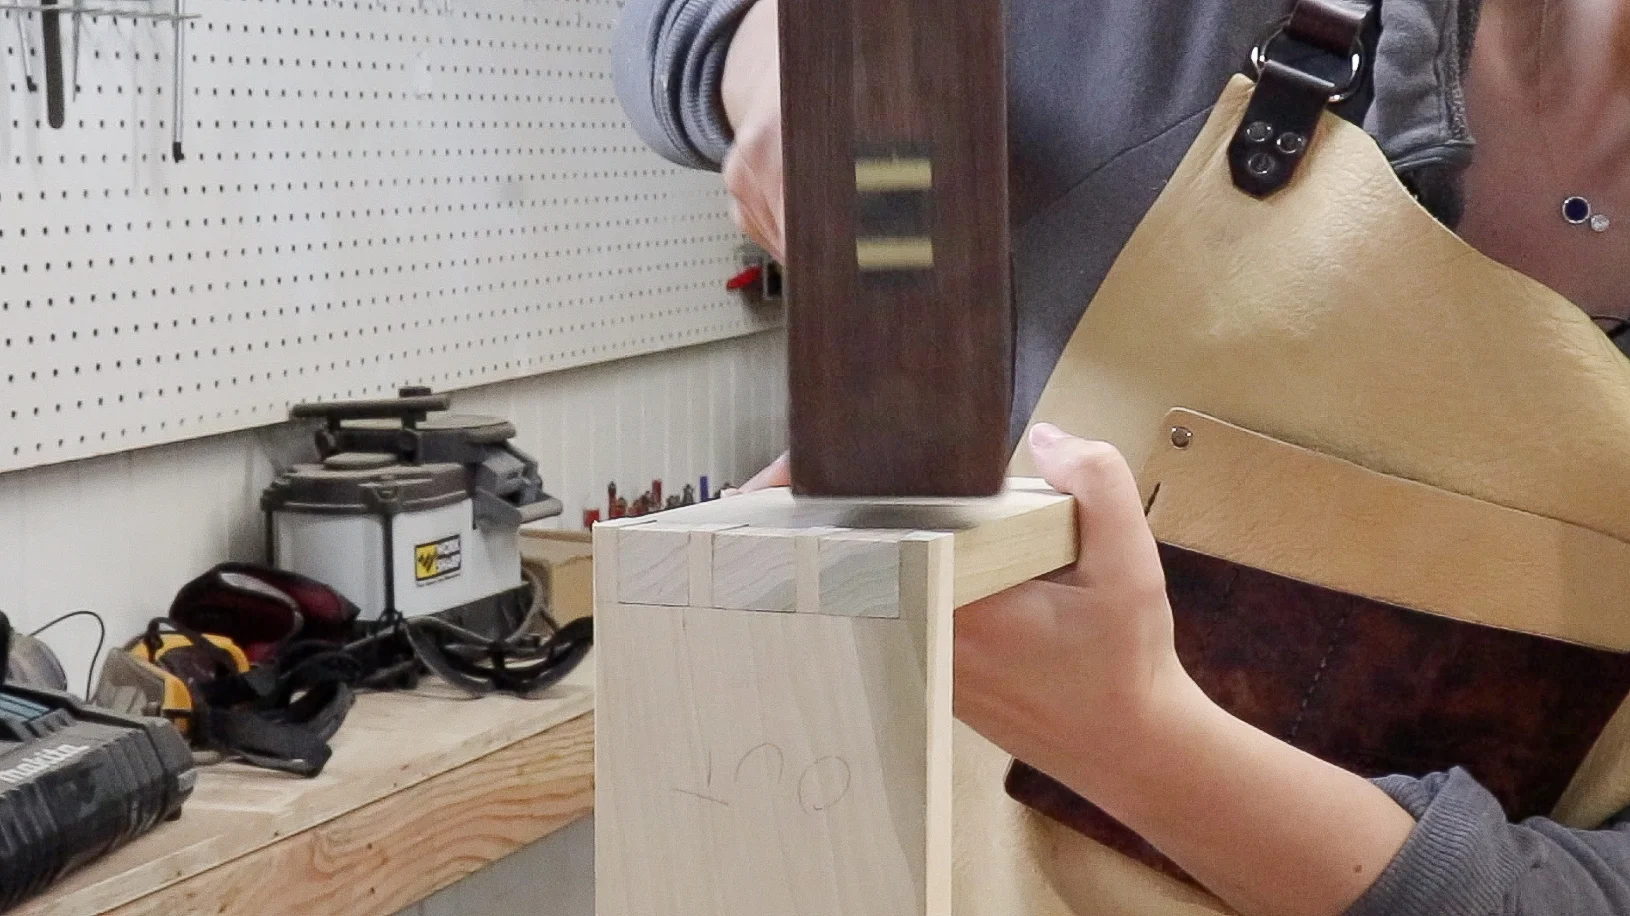
And after sanding, information technology looked fifty-fifty better.
I am so happy with how this jig came together and I am even happier with the results.
Yes, at that place is some chisel piece of work and fine tuning with the tails, so information technology volition accept a little practice to get perfect, but I am and then excited I have a quicker more efficient way to start adding dovetails to my pieces.

How To Make A Dovetail Template,
Source: https://www.3x3custom.com/tutorials/table-saw-dovetail-jig
Posted by: strongpressessidow1985.blogspot.com
0 Response to "How To Make A Dovetail Template"
Post a Comment